
Have you ever wondered how difficult it would be to put together your own trampoline? How do all the parts go together?
However, the trampoline is fairly simple to assemble, and I would say that most DIYers with basic tool knowledge can successfully assemble it with proper planning. The hardest thing was getting everything out of the package, before I started I threw everything on the floor and went for coffee 🙂
Preparation
Assembling a trampoline can be fun if you are properly prepared.
Most of the trampolines sold in the market today are designed for safety and ease of assembly. However, there are still some things to consider when you are preparing for assembling your own trampoline. It is essential that proper preparation should be done prior to starting with the assembly process to avoid any problems and complications later on.
1. Read The Trampoline Assembly Manuals
The first step in preparing for assembling your own trampoline is to read the instructions and safety precautions that come along with it. Although most people think that assembly instructions can be easily understood without reading it, this does not apply to trampoline assembly instructions.
The instructions given by manufacturers will probably contain steps and methods for easier understanding and guidance like keywords like “first, second, third” or “a, b, c”. As such, you should get yourself familiarized with these terms and focus more on these written instructions instead of merely relying on pictures.
2. Check the Packages

Take all the parts out of the box and spread them on a flat surface. Go through each step of the instruction manual and ensure that you have all the necessary parts. You should check for any missing or damaged parts before starting to assemble your trampoline. If there are any missing pieces, replace them immediately and return the package to your vendor.
3. Make Sure You Have Enough Space
Measure the intended space again, and check that you don’t have any clotheslines or tree branches to get in the way. And then of course you need ample space around the trampoline as well so you can move around comfortably.
4. Tools Required

Another tip in preparing for assembling your own trampoline is to make sure that you have all tools required like a wrench or screwdriver. You can even ask a friend if he or she has a tool kit that you can borrow from. Some tools may not be essential but they will surely help you when the time comes for assembling your own trampoline.
You Need:
- A hammer
- A screwdriver
- 8-foot level or a 4-foot level and a 12-foot tape measure
- Safety gloves
- Cordless Drill
- Ladder(optional)
Assemble Your Trampoline
Getting your trampoline up and working is easier than you think. You don’t need to be an expert or have tonnes of experience to put your trampoline together. All you need is common sense, patience and a few simple tools.
1. Assembling the Trampoline Frame
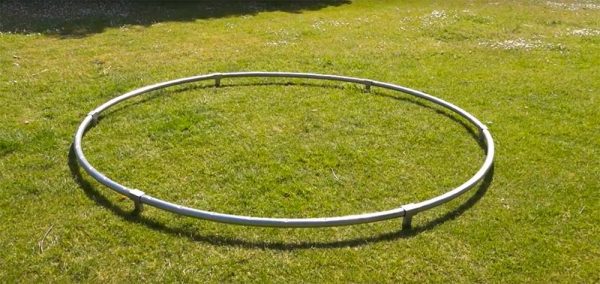
The first thing you need to do is lay out all of the parts so that you can easily locate them.
Once you’ve got your trampoline parts organized, the first step is to put together the frame. Make sure that all of the screws and bolts are tightened down securely as you go. If you find that something is not fitting together properly, go back and make sure that everything is lined up correctly. The last thing you want is for your trampoline to fall apart after a few days of use.
2. Setting Up the Mat
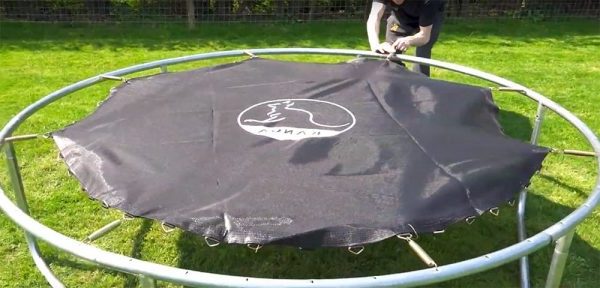
Setting up the mat for your trampoline involves two steps: firstly, attaching the springs, and secondly, positioning the mat itself on top of the springs.
Attach the springs to the frame – Each spring has one hook at the top and one at the bottom. The hooks on either side should fit through two holes on opposite sides of the frame, so that when you push them through, they face each other and keep the springs from sliding out of place.
Attach four springs across each side of each jumping mat – Each spring should fit into an attachment near one end of the mat and not move once it’s attached.
3. Putting Together the Enclosure Net

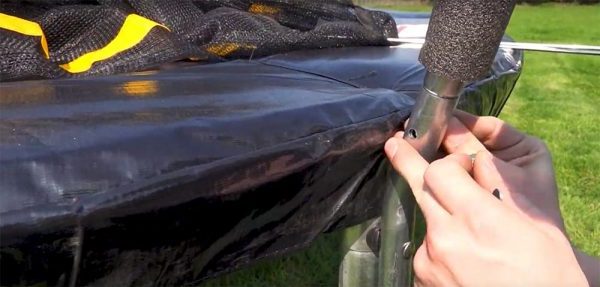
Now that you have the frame for your trampoline, it is time to put together the enclosure net. The frame will act as the center pole of the enclosure net. Here is how to assemble your enclosure net:
1. Lay the frame on the ground with the outside of the frame facing up.
2. Take one corner of the net and wrap it over one of the outside beams of the frame. Pull it through until there are no gaps between the bottom beam and the top beam of the frame. Then secure it with a zip tie, securing both ends on one side of the frame. Repeat this process for all four corners of your trampoline.
3. Once all four corners are secured, you can flip your trampoline over so that it is face down on the ground. From here, you can begin to weave in more zip ties through each connection point on each corner until all four corners are completely secured.
4. Installing Ladder and Trampoline Anchors
If you receive the steel ladder, you should fix it on the trampoline frame. Most ladders do not have any screws. They have a simple installation and use design.
When climbing the ladder, ensure that the ladder does not move/shake. The ladder provides easy access to the surface of the trampoline for children and everyone.
You should also install wind stakes or anchors on the trampoline. The anchor is installed on the trampoline leg to prevent it from flying away in strong wind. You can also use sandbags and wind stakes to add more protection to your trampoline.
Trampoline Safety Rules for Younger Kids
Your kids love bouncing around on your trampoline, and it’s a fun way to get some exercise as a family. But you need to make sure you’re following trampoline safety rules to protect your kids and ensure they have fun.
When your kids are young and small, the safest way for them to play on a trampoline is to have them use the tramp together with an adult. There are additional safety rules you should follow:
Always supervise your kids when they’re on a trampoline. Make sure you’re close enough to reach them immediately if they’re about to jump off or if they fall off.
Never let more than one person bounce at the same time, and don’t bounce with your child unless you’re right there with him or her.
Never allow anyone under the age of 6 to play on a trampoline, because a child this young lacks the motor skills, strength and judgment required for safe trampoline play.
Keep toys and other items with strings away from the trampoline. If a kid gets tangled in a string while jumping, he or she could end up falling off the mat.
No roughhousing or playing that involves diving into the middle of the mat or attempting flips and tricks.
Conclusion
Now that you know how to assemble your own trampoline, just go out there and do it. While there are some risks involved in setting up your own trampoline, it is important to remember that these risks are just that — they’re risks. Your safety comes down to simple common sense. If you use your head when setting up your trampoline, you’ll likely be fine.