
Therefore, you are determined to buy the trampoline and jump down and up to, you may. Prior to you love this particular enjoyable packed bouncing contraption; you very first need to put together this.
Except, you possess the particular trampoline sent to your garden currently assembled. Along with the accompanied by a few people or even on your own, you can simply set up your trampolinein absolutely no time.
This manual will assist you to assemble the trampoline simpler
First of all, Have a look at the Package:
The very first thing you have to do would be to check out the package prior to you obtain almost all covered up in constructing the trampoline. Verify in the box, or maybe more boxes (it generally is shipped in 2 boxes), the components through putting all of them away from the ground or even the field along with the particular checklist integrated into the manual for setup.

You usually do not want to start building a package together with imperfect components.
If you find that in the center of the setup, even when you tend to want to finish the setup, I’m sure you’ll probably get because discouraged and like a kid without the goodies on a very hot summer day. Therefore, first make sure that all the parts are in the package.
The first thing you need to do is to make sure that all the parts are in the package. The first thing to do is to make sure that all the parts are in the package.
- Equipment probably required:
- Phillips electric screwdriver (It generally includes the package) you may also how to use a drill to create setup quicker.
- The pulling gadget to the particular springs:
- Rubberized Mallet to set up the particular springs correctly:
- In case everything is all right and you have the ability to require equipment available after that, you will be ready to put together your trampoline!
Setup Instructions of Trampoline:
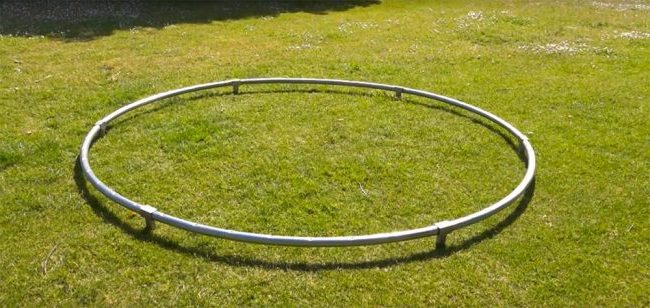
Step 1:
Place the items away in the circle or even ring. Through having the items in the circle you obtain a real feel showing how large the trampoline is. Ensure that whenever you construct the particular ring framework of the trampoline you place all of them away correctly. Connect every portion of the ring before affixing the hip and legs.
Step2:
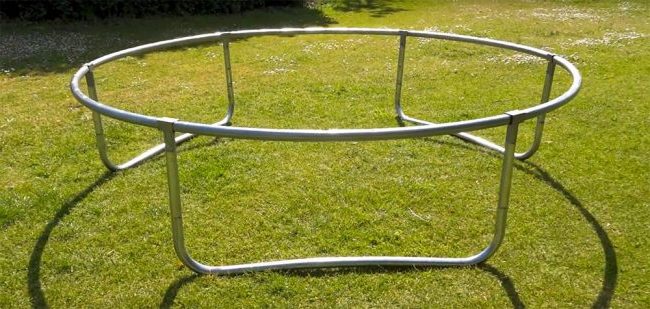
As soon as the ring continues to be connected completely, put together the hip and legs and connect these to the ring. For larger trampolines ensure that the pieces a good on beyond the ring. Additionally make certain the particular holes get in line. Total the procedure until you connect almost all the legs in order to the exact ring.
Step 3:

Get the bolts/screws integrated and bolt all of them in their correct locations. Ensure that every bolt is firmly locked in the spot to ensure that the particular trampoline is safe for you to make use of. Your own foundation is currently total. Right now, the difficult component starts.
Step 4:
As soon as the ring is total, you may unfold the trampoline and place it on the ring. Connect the springs in order to the specified hooks on the bounce pad before affixing this in order to the exact metallic ring. There is certainly really a lot more than one method of affixing the trampoline in order to the metal ring.
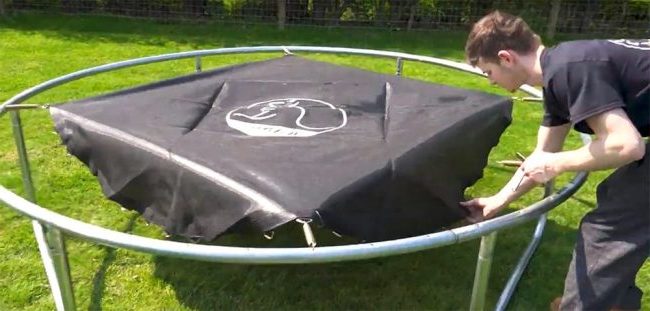
One of the ways would be to connect the hook in order to the bounce pad after which in order to the metallic ring. You particularly can accomplish this procedure by heading through the left side in order to the right side.
You will need to utilize the pulling and rubberized mallet in order to set up the springs on the metallic. You will certainly observe as soon as the bounce pad is usually more than midway, carried out the trampoline will get stronger therefore you will need to draw the spring more difficult and lb in the hook on metallic ring having a rubberized mallet. Start this method until you complete everything.
Step 5:
Since you are executed along with the difficult component, you need to set up the spring guard. You simply have to place it on the springs and discover an area of the guard that has gaps. These types of gaps ought to be on the bars of the metallic stand.

Fasten the spring guard strongly in order to avoid any kind of accidents or even scrapes. A few spring protections possess Velcro and even a few possess ropes. For spring protections that have ropes, it is advisable to tie up utilizing a single tie technique to ensure that you can simply eliminate the guard during wintertime.
Advantage:
For larger trampolines, that have the screen guard on the edges, an extra setup is required. Ensure that the padding is correctly set up on the curved metallic. You Tie up or even Velcro the particular screen on the padding and even set up the padding on the external layer of the particular trampoline. Safeguard the particular net by bolting this firmly on the base.
Suggestions:
- Try always to obtain assist, easier along with three people. (Two are okay although)
- You should never make use of a trampoline lacking springs simply because you might rip the bounce pad.
- Try to Make certain every spring is in location correctly.
Alerts:
- You should always stick to the Indicators on the trampoline!
Conclusion
I hope I’ve saved you a lot of time trying to assemble your round trampoline on your own. If you have any additional tips or tricks that can help others trying to assemble their round trampoline, please feel free to share.